Create a Pre-Production Test environment for your TFS
There are a lot of legitmate reasons to create a clone of your TFS installation: verifying an upgrade, testing some customization and so on, but traditionally creating a test environment is not an easy task.
The problem is avoiding that the test installation could interfere and corrupt your production instance and since TFS is a complex product, there are a series of steps you need to do to perform this kind of operations. Thankfully with the upcoming version of TFS most of the work will be accomplished with a wizard.
Kudo to TFS Team for including a wizard experience to create a clone of your TFS Environment.
Here are the detailed steps to create a clone environment.
Step 1: Backup Database / install TFS on new Server / Restore Database
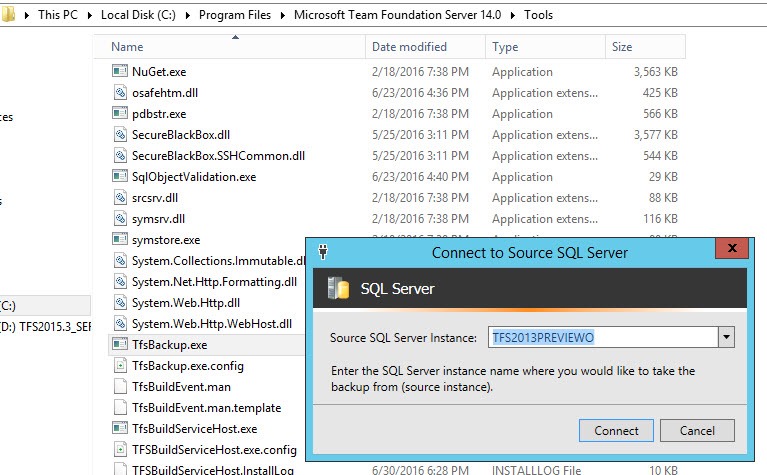
First of all you can login to your TFS server, open c:\Program Files\Microsoft Team Foundation Server 14.0\Tools and launch TfsBackup.exe to take a backup of all databases.
Figure 1: Take a backup of your Production Database
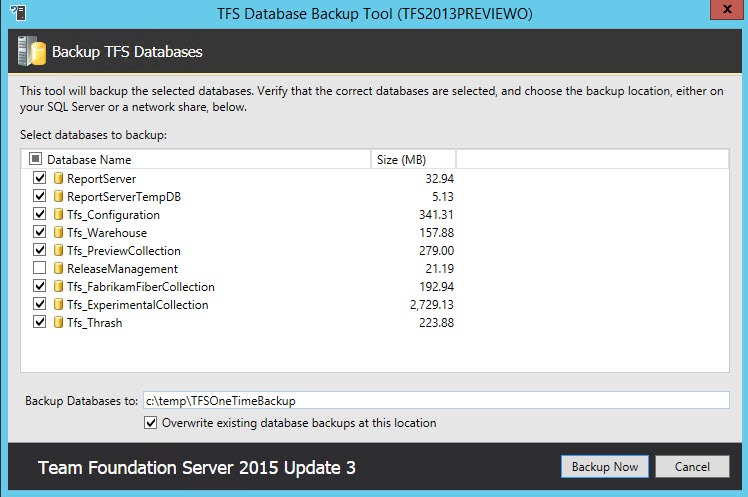
You should only specify the name of the instance of SQL Server where you have your production databases. A wizard will start asking you to select databases to backup and the location where you want to place the backup.
Figure 2: Choose databases to backup
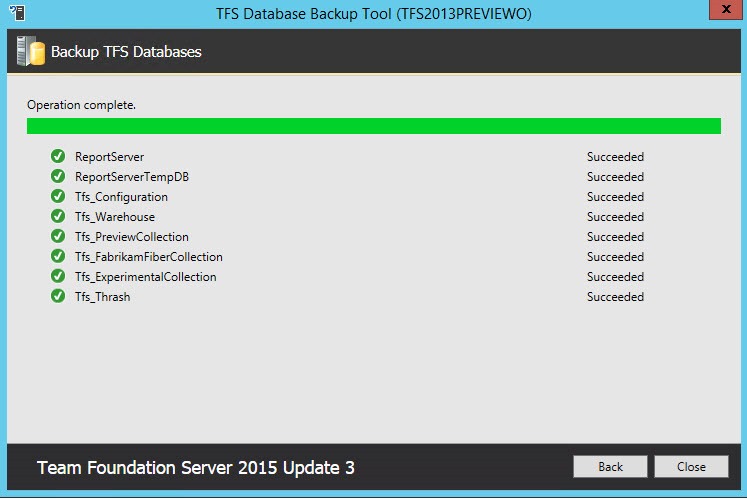
The backup routine will perform a full backup.
Figure 3: Backup is taken automatically from the routine
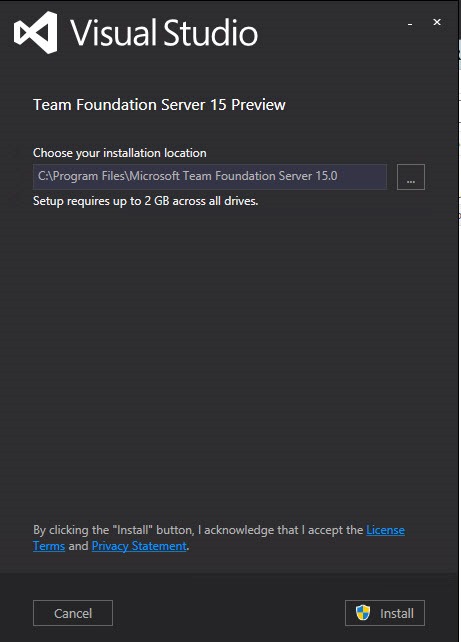
Next step is creating a new Virtual Machine, install Sql Server in a compatible version with TFS “15” preview (I suggest SQL 2016) then install TFS.
Figure 4: Install TFS on the target machine
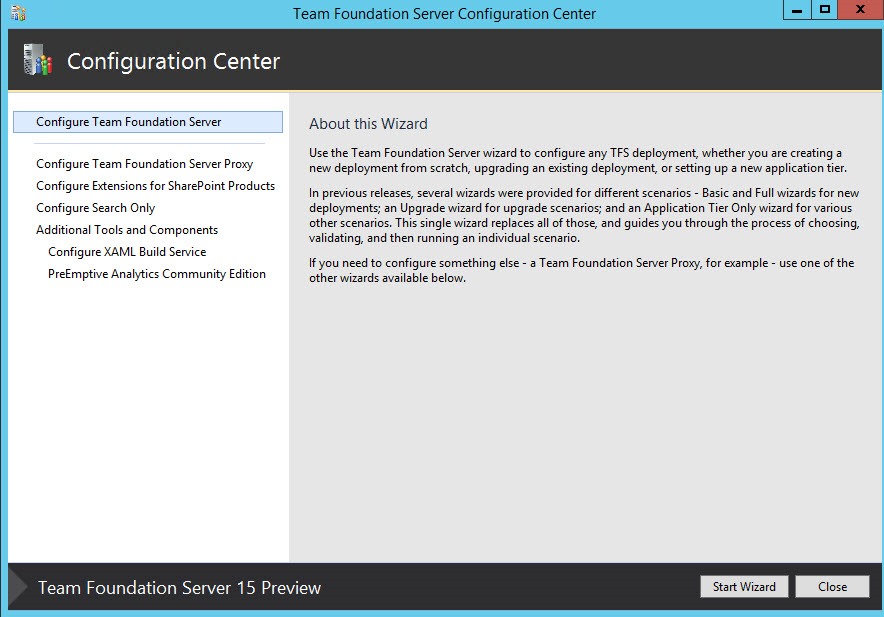
Once the installer finishes TFS “15” Configuration wizard will appear
Figure 5: Once installer is complete the Configuration Wizard will ask you to configure the server
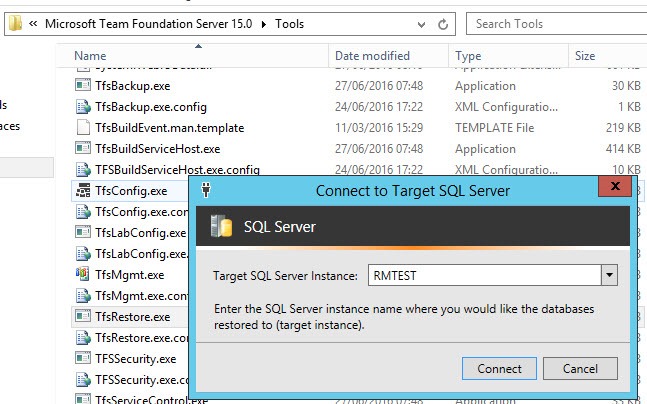
Now you should go to c:\Program Files\Microsoft Team Foundation Server 15.0\Tools and launch TfsRestore.Exe.
Figure 6: TfsRestore will perform database restore
You should only choose the name of the SQL Server instance you want to use, in this example I’m creating a Pre-Production environment composed by only one machine called RMTEST. You should transfer backup file to target computer or place them in a network share accessible from the Target machine.
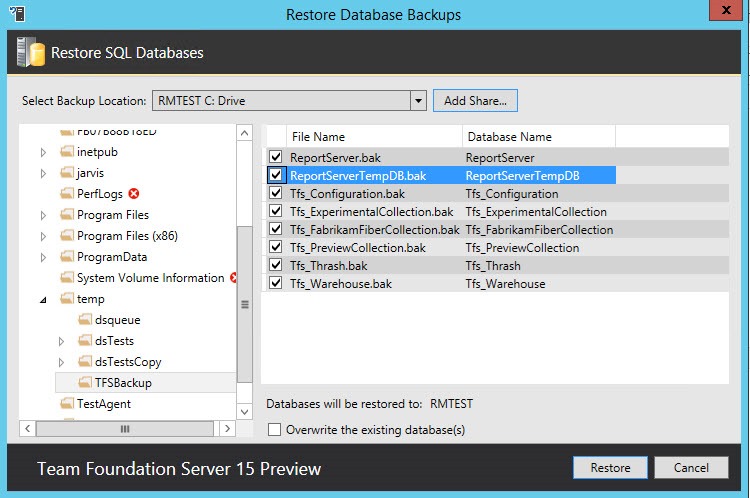
Figure 7: Restore routine will prompt you for Backup Location
Once you specify the directory with the backup the wizard will automatically list all the database to restore for you.
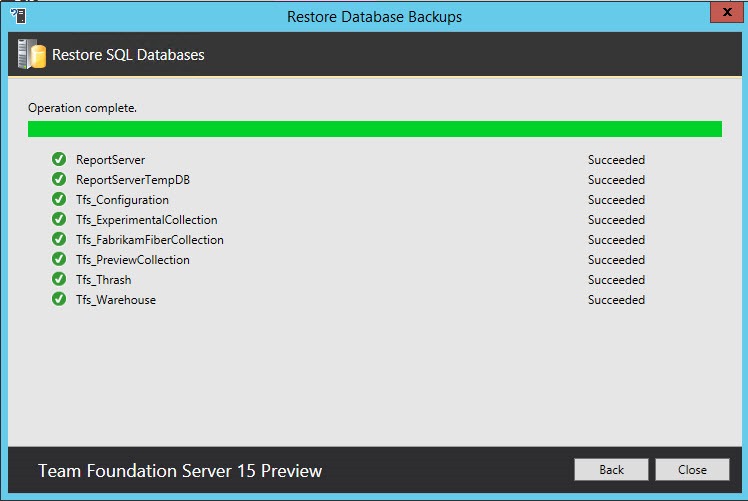
Figure 8: Database are restored in Sql Server
Step 2: Extra security precautions to avoid Production corruption
Now all databases are restored in the Sql Server that will be used by the Pre-Production environment and you can start TFS configuration wizard, but I’ll wait to perform extra security precautions.
You should edit the hosts file of Pre-Production machine to redirect to an inexistent IP every machine name used in Production Environment. As an example, I have Build and Release definition that will deploy software on demo machines, and I want to prevent that a build triggered on Pre-Production TFS Instance will access Production servers.
As extra security tip, I suggest you to use the hosts file trick to minimize the risk of Production Environment corruption
Figure 9: Editing hosts file will guarantee extra safety net against Production environment corruption
As an example, in Figure 9 I showed a typical hosts file, the Production instance is called TFS2013PreviewOneBox so I redirect this name to localhost in the new name. Then I redirect all machines used as deploy target or build server etc to 10.200.200.200 that is an unexistent IP.
You can also create some network rules to isolate the Pre-Production machine from the Production Environment completely, such as placing it in another network segment and prevent routing entirely, but using the hosts file is a simpler approach that works well for small and medium installation.
Step 3: Perform the configuration with new TFS “15” wizard
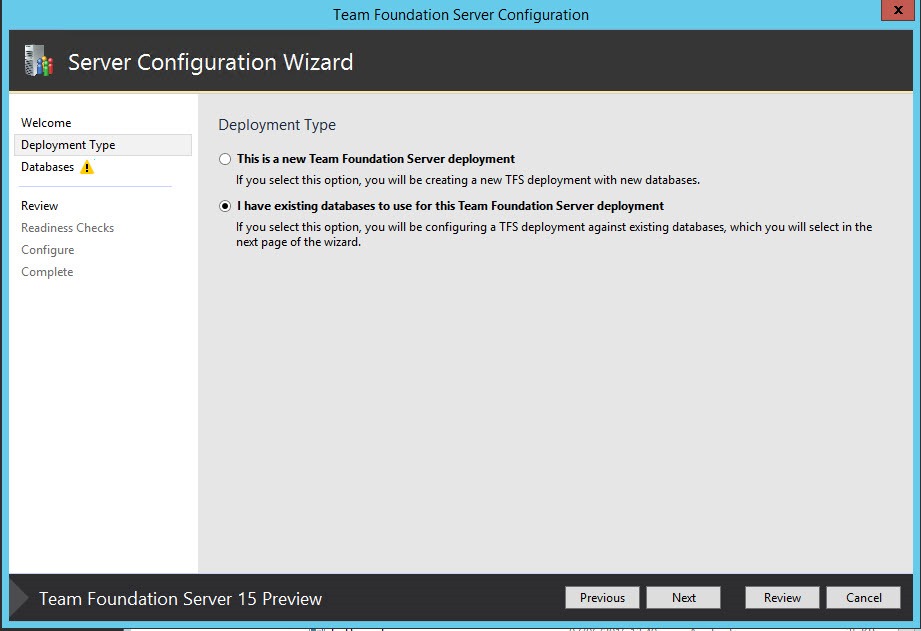
Before TFS “15” now you should resort to command line trickery to change server id from database etc, but luckily you can do everything using configuration wizard. Lets come back to Configuration Wizard and choose the option “I have existing database to use … “
Figure 10: Start upgrade wizard using existing databases
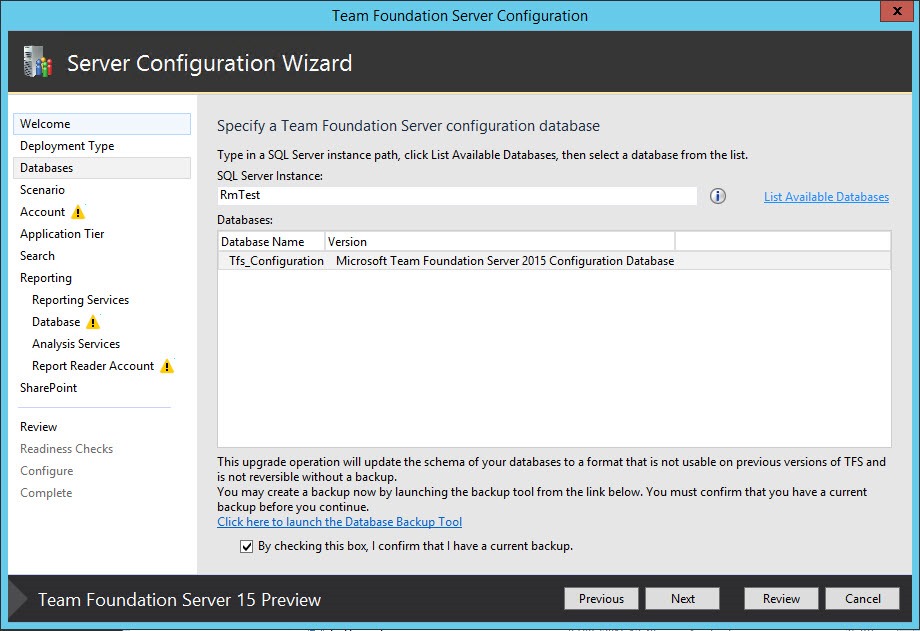
The wizard will prompt you to choose the instance of Sql Server and the database to use.
Figure 11: Choose database to use for the upgrade
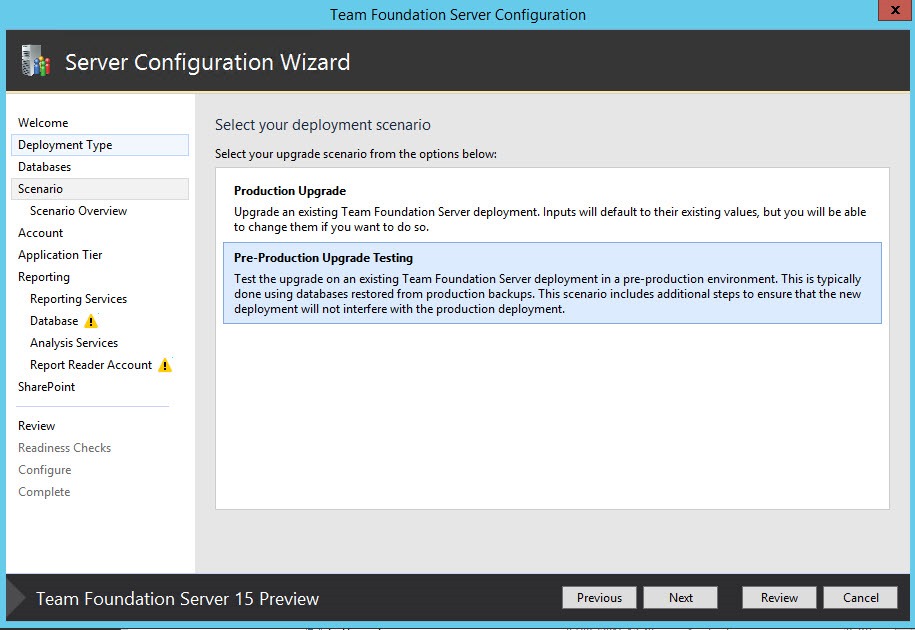
Until now it is the standard Upgrade Wizard, but the next screen is the great news of this new installer because it will present you the option to create a Pre-Production environment.
Figure 12: This is the new option, you can choose to create a Pre-Production Upgrade Testing
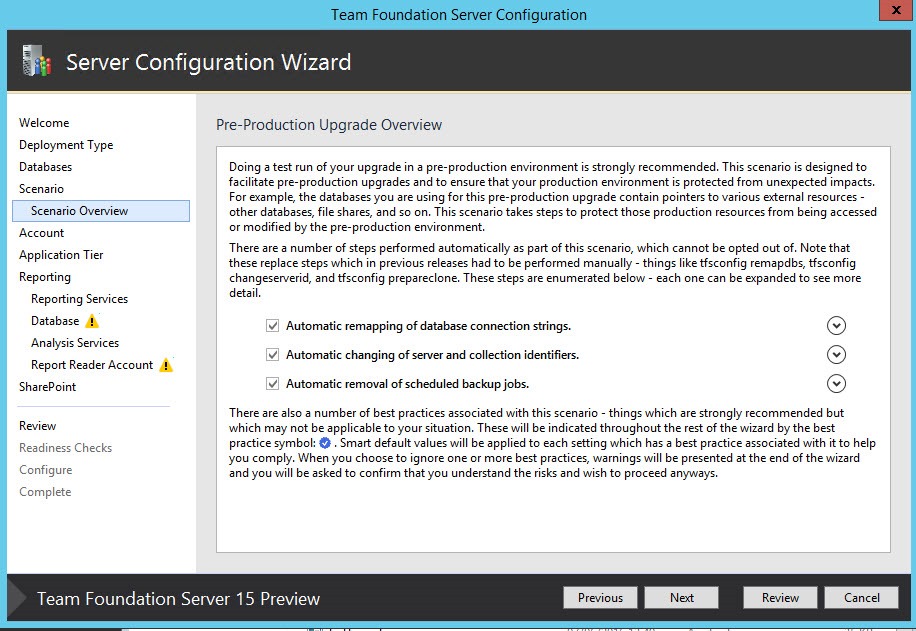
Pressing Next you will see another screen that reminds you the step that the wizard will perform to create the Clone environment. As you can see the wizard will take care of remapping connection string, changing all identifiers and remove all scheduled backup jobs.
Figure 13: Overview of the Pre-Production scenario
Thanks to the wizard you can create a Test Clone of your Production TFS without worrying to corrupt your Production environment. The wizard will takes care of everything
Now the wizard will continue, but there is another good surprise, each screen contains suggestions to minimize risk of Production Environment corruption.
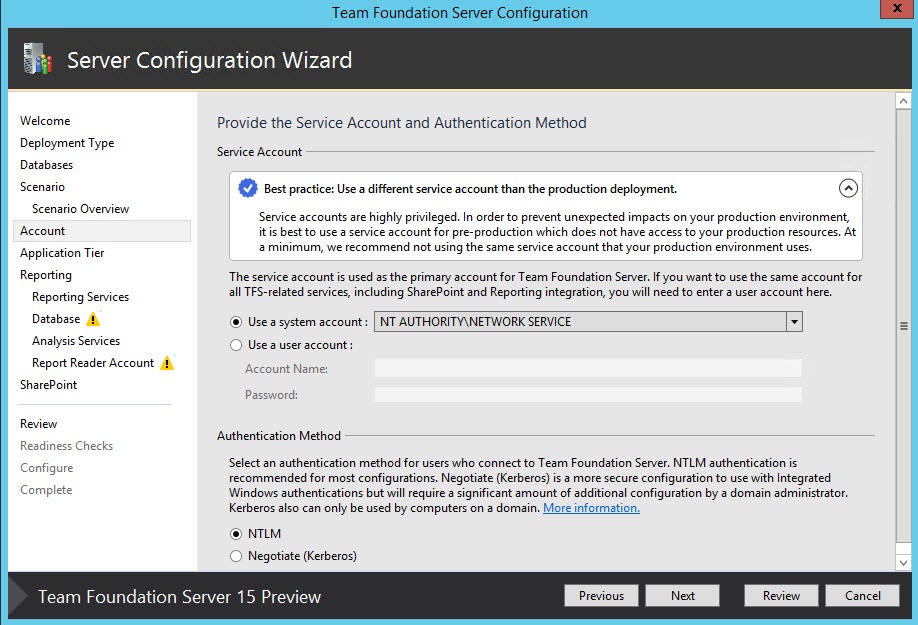
Figure 14: Wizard suggests you to use a different user to run TFS Services
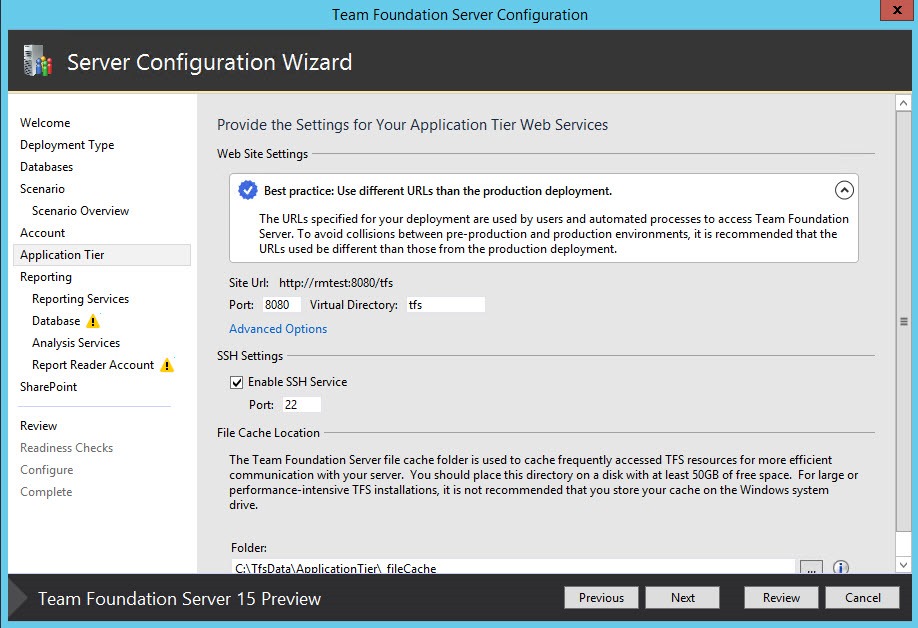
The suggestion in Figure 14 is the most important one, I usually use an account called TfsService to run my TFS Server and that account has several privileges in my network. In the Pre-Production environment it is better to use standard Network Service account or a different account. This is a really important security settings, because if the Pre-Production server will try to perform some operations on other servers it will probably be blocked because the account has no right permission. > Never use for Pre-Production environment the same users that you use for Production environment to minimize risk of corruption. Use Network Service or users with no privilege in the network created specifically for Cloned Environments Clearly the wizard will suggest you to use different url than production server. Resist the temptation to use the same url and rely on hosts file redirection, it is really better to use a new name. This will allows you to communicate this new name to the team and ask them to access Pre-Production server to verify that everything is working, as an example after a test upgrade.
Figure 15: Use a different url than production environment
You can now follow the wizard, basically the screen are the same of the upgrade, but each screen will suggest you to use different accounts and different resources than production instance.
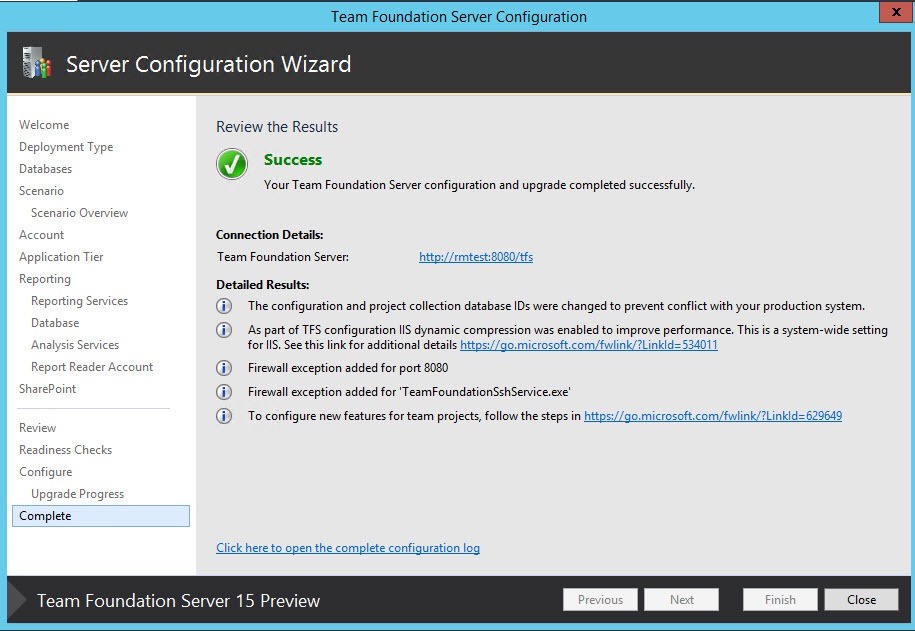
At the end of the wizard you will have a perfect clone of your production environment to play with.
Figure 16: Configuration is finished, you have now a Clone of your environment.
Step 4: extra steps for furter extra security
If you want to be Extra sure that your production environment is safe from corruption, configure the firewall of your Production system to block any access from IP of any machine part of cloned environment. This extra security measure will prevent human errors.
Some customers have custom software that connect to TFS instance to perform some custom logic. As an example you could have software that use bisubsribe.exe or hooks to listen to TFS events then send command to TFS. Suppose you want to test this kind of software against your Cloned environment, so you let people install and configure everything on Pre-Production machine, but someone did a bad mistake and configured the software to listen to the Pre-Production environment, but send command against Production Environment. If you blocked all traffic from Pre-Production machines to your TFS Production environment you will be protected against this kind of mistake. If you are good in networking, probably the best solution is creating all machines part of Pre-Production environment (TFS, SQL, build server, etc) in another network segment, than configure routing / firewall to allow machines in pre-prod network to access only domain controllers or in general to access only machine that are stricly needed. This will prevent machines from Pre-Production environment to connect any machine of your Production Environment. You can then allow selected ip from your regular network to access Pre-Production for testing.
Gian Maria

