Manage image in openXml format part2
In a previous post I deal with image insertion into an openXml document. Now it is time to show how to change image dimension, I want to be able to define new dimension and to choose if the image should be stretched or no. The w:drawingelement has two distinct part to manage image dimension, the first is the wp:extentnode, child of the wp:inline one.
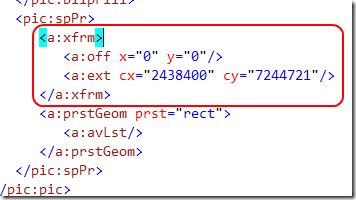
This node determines the extent of the area of the document that will contain the image, but to really change dimension of the image we should operate in a different tag:
The spPrnode is used to determines the shape properties as described in the section 4.4.1.41 of the specification of the openXml format, it contains the xfrm node, that is used to apply 2D transformation to an object. This particular node is used to specify the offset of the picture into the area, and the ext is used to set the real image dimension. The code to change image width is the following
| |
I store a sample of the image xml code in the resource file of the project, then I simply change image Id as described in the previous post, finally I change the width and height of the wp:extent. Since the value of these tag are to be expressed in EMUs (that is English Metric Units and not the famous animal) I multiply for 9525, a constant that converts from pixel unit to EMUs. The function SetImageDimension sets the a:xfrm node.
| |
As you can see in the sample image code I write ###widthr### and ###heightr### tag to set the correct format, if the StretchImage is set to true, I simply set the width and height as specified from the user, if it is false I should make some simple calculation to avoid image stretching.
Now I’m able to resize the image as desidered.
alk.
Tags: docx openXml Format


