Azure DevOps: Convert your classic pipeline in YAML
2020 is almost ended, it is time to use the new Export YAML feature to move all of your pipeline to yaml
When I teach to customer Azure DevOps pipeline, I always suggest them to avoid the classic editor and direct learn the tool using yaml pipeline; while we can agree that classic GUI based editor is simpler, it also miss many of the advantages of YAML and have limited use.
Yaml based pipeline have a lot of advantages, first of all they are included in the code (I really love have everything in my repository), you can simple copy and paste in new projects, templates are really powerful and also your pipeline definition follow your branches.
At the date of today, there is absolutely no real advantage in using classic pipeline editor, YAML should be preferred in all the situations.
If you, like me, use pipeline from a long time you surely still have classic pipeline from the days when yaml was not available or ready but it is now the time to convert. Thanks to a recent update in Azure DevOps we have now a dedicated export YAML feature to convert an entire pipeline to YAML.
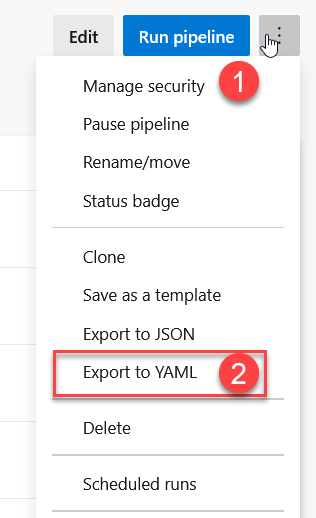
Figure 1: Export to YAML feature in pipeline detail page
This nice command convertw the entire pipeline to YAML. Conversion is quite good and require you to do some final polishing of the result before it is ready to use. Usually the only thing you need to change are variables and parameters definitions.
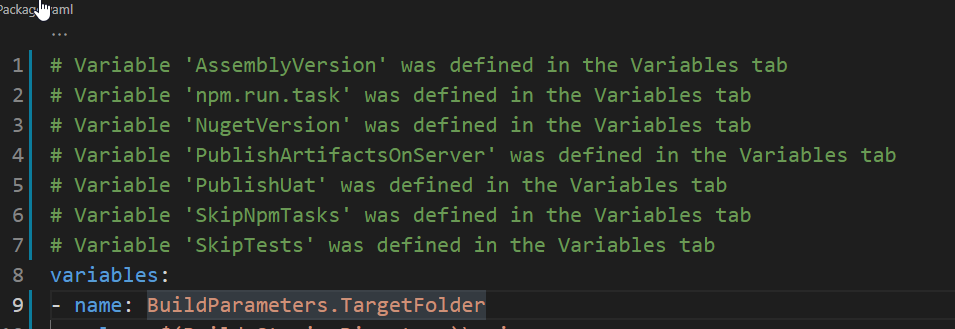
Figure 2: Conversion warnings to help you in converting your pipeline
As you can see from Figure 2 you have probably variables contained in classic pipeline definition, all these variables need to be redefined in YAML definition. First of all you should open the Variables tab in original definition to have a clear idea of which variables are defined for that pipeline, then add each missing one in resulting YAML.
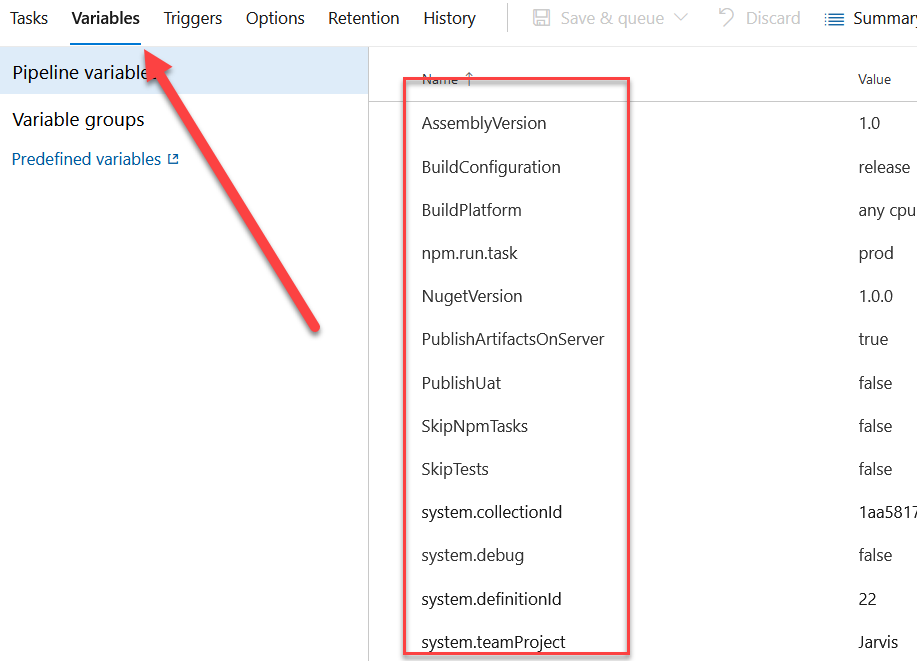
Figure 3: All pipeline variables defined in the original definition
After you converted all these variables in simple variables inside YAML build definition, you still have work to do. This because variables in YAML definition cannot be specified at queue time, and you need to use a different strategy for variables that can be set at queue time.
The main area of intervention during conversion is creating parameter and variables.
Each variable has a flag that specify if value is settable at queue time as you can see in Figure 4 and if you want to maintain this ability you should create a suitable parameter to allow override at queue time.
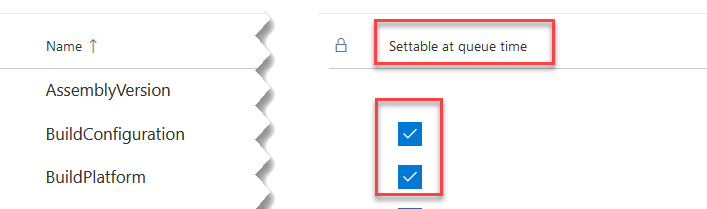
Figure 4: Identify all variable that are settable at queue time
For each variable that can be set at queue time in the original definition you should create a parameter and use that parameter in variable definition. This technique allows the user to specify a value at queue time, but you can access all variables with the standard syntax so you do need to touch converted code. As an example for variable PublishUat I started creating a parameter:
| |
Parameters allows the user to specify a value during queue time, and you MUST specify a default value if you want this build to run with an automated trigger. As you can see in previous snippet, you can also specify a type for the value, like boolean, string etc. Once you defined a parameter you proceed to define related variable that will use that parameter.
| |
This simple technique allows you (look at Figure 2) to define all original variables with the very same name, but at the same time let the user to change value at queue time thanks to parameter. In previous example, since I’ve defined a variable called PublishUat every converted task that uses the original property with $(PublishUat) syntax will work perfectly. Remember that parameter syntax is ${{ parameters.PrameterName }} so if you convert a variable to a pure parameter you need to change every usage in converted code.
Using a combination of parameters and variable you minimize the need to modify converted code
Now you can proceed for every missing variable in converted script and, if you want to be able to specify a different agent pool at queue time, you should add another parameter. Classic pipeline allows you to specify the pool at queue time, YAML is not different, but you need to add a parameter.
| |
A nice advantage is that you can specify a valid list of values, in my example this pipeline can run only on default and fast pool, leaving the user no other option. When you define the job you can use the Pool parameter to specify the pool and the game is done.
| |
Once you converted the pipeline you can try to run it and verify if every parameter is ok. As you can see from Figure 5 all parameters are now easy to setup by a user, because you specified a nice description value. You can also choose the pool that is restricted to default and fast pool, so the user does not incur the risk of scheduling the pipeline in a pool that does not have a suitable agent.
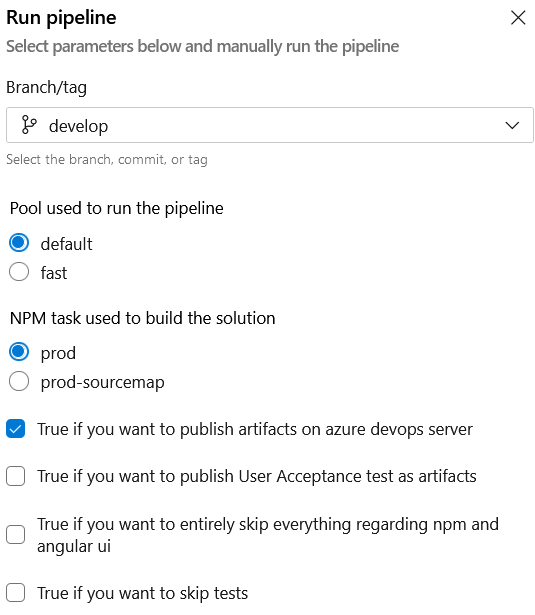
Figure 5: Manual run of the pipeline after conversion
Finally you should probably set pr trigger to none, or converted YAML build will run for each Pull Request.
| |
As you can see from the above trigger definition I’ve explicitly disable Pull Request triggering in line 13, because this build is not supposed to validate any PR.
The whole conversion should not require you more than 15 minutes, unless you really have a huge number of variables, I’ve converted various pipeline and the only work needed is recreating parameters and variables in converted build. Once converted build is ok, you can disable the old one, do not delete it and leave it around for some more time in case you discover some problem in converted build during regular use.
Gian Maria.