Streamlining Cloud Deployment: Azure DevOps and AWS Integration Strategies
This post explores efficient cloud deployment strategies using Azure DevOps and AWS. It discusses leveraging S3 buckets to store installation scripts and pipeline artifacts.
Let’s assume we need to deploy in a cloud environment and prefer not to install an agent on each physical environment. For example, managing numerous agents across multiple virtual machines becomes cumbersome from an Azure DevOps standpoint. While we can surely create an environment for each distinct installation, usually this create some burden administrating the agents.
In such a scenario, the optimal approach is to create simple PowerShell or Bash installation scripts that will be distributed along pipeline artifacts. These scripts simply will deploy artifacts in local machine without need of an agent. The only challenge that remains is how to transfer the pipeline artifacts and scripts to the target machines.
Suppose we are in an AWS environment. Here, a practical solution would be to create an S3 bucket to store both the installation scripts and the pipeline artifacts.
In my scenario, the installation files are maintained in a Git repository within Azure DevOps and are updated alongside the software release. This approach allows for the lifecycle of the scripts to be separate from the main repository, resulting in a single script repository containing all the necessary scripts for deploying each microservice.
How do we physically move the pipeline artifacts and scripts into an S3 bucket, especially considering security requirements that ensure the S3 bucket isn’t exposed to the internet?
The best solution is to create a small virtual machine within the AWS account and install an Azure DevOps release agent on it. Release pipeline will not really “release the software” but instead copy the build artifact files and installation scripts on to the S3 bucket. This technique resembles the use of a bastion host, which serves as a singular access point to enter machines within a secure network area.
Consequently, initiating a release build entails instructing the bastion machine within the AWS account to download specific version artifacts of the builds and scripts and copy them to the destination bucket. Here is the declaration part of the pipeline.
| |
As you can verify this pipeline does not trigger automatically and declare two related resource, the first one is a pipeline called UniqueHost the other is a repository. In both the resources you specify default version, master branch for the pipeline and master branch for the repository. This will setup the dependencies and specify all the resource I need to copy on S3 bucket. As you can see the name of the environment is AWS-bastion-01, an agent installed on a tiny virtual machine that is the only agent in that specific account.
Now for the execution part we have a really simple pipeline.
| |
As you can see we simply be sure to delete old artifacts cleaning the Pipeline.Workspace directory, this is necessary because you can have old run still in agent folder. Then we download DeployPackage artifacts from the UniqueHost pipeline, checkout the JarvisSetupScripts repository and finally we use aws cli to copy everything to the S3 bucket. Since we are running inside a VM in AWS we have aws cli installed also we attach a specific IAM role to this machine to be sure it has the right to write on the S3 bucket. All the other VM that needs only to read from the bucket will have a different role permission that allows them to read but not to write in that bucket. This is necessary because we want to be sure that software running on all the installed VM have not possibility to mess with the release script.
Using ##vso output syntax we will change the name of the release to something meaningful, in this case we use the version of the UniqueHost pipeline, determined by gitversion.
Now here is how the pipeline looks like in Azure DevOps.

Figure 1: Bastion release summary
On the various virtual machines, it’s simply a matter of copying the packages and installation scripts from the S3 bucket and executing the script locally, eliminating the need for an installed agent.
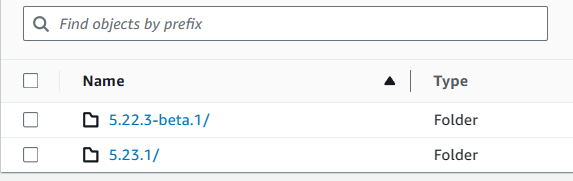
Figure 2: Result of the deploy in the bucket
As you can see we have in Figure 2 the result of a couple of deployment, where we have a nice sub-folder with the exact version of the deploy, taken from the name of the build that determines the number with gitversion.
As a summary:
- We install a single agent for the entire AWS account.
- The agent uses standard pull mode to download the pipeline artifacts and installation scripts.
- You do not need to open ports or anything
- The release pipeline download artifacts and scripts and place in S3 versioned folder
- You then use script and artifacts to update multiple installations in a single account
Gian Maria.